Mini-Tutorial: Making long lasting Paper Miniatures
Hello,
I've seen a lot of people using paper miniatures but I wanted to show a way to create long lasting paper minis for a low cost.
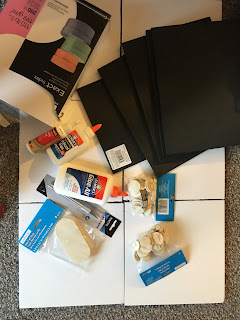 All that you need for this project is:
 Head over to junior general, or another paper miniature website, and print off sheets for your units. As you see I've printed off some USMC and some Insurgents. Junior General has loads of free models in all periods and even top down views if you want.

 Using your cutting tool cut out some of your soldiers like so. Try to keep it as "Square" as possible as it will make cutting and trimming the foam easier. Then cut along the line splitting the back and front. Keep these together!
 Now its time to cut out the foam. Place one of your cut outs on the foam and trim around it creating a foam square (or rectangle) of the same size.
Step 4: Gluing
Now you glue ONE side onto the foam piece. If using normal printer paper you will want to use glue that is low in water. A good strong glue stick will work or apply a thin layer of Sticky Tack Glue which dries in minutes.

 Now what you do is simple, just glue your foam token onto the base. What I did was use the medium bases for infantry and then used the large bases for weapon teams. The small bases will be used for counters and possible IEDs and land mines.
 Sometimes your infantry miniature will hang over the medium base. (Especially the crouched soldiers) For me this was fine but you can either use long craft bases for this (like cut up pop sickle sticks) or put them on the large base.
NOTE: If you wish to decorate the bases then you need to do that BEFORE you glue it onto the foam so that you don't paint on the foam token. If you wish to decorate them after you've glued I suggest using PVA glue and some flock or rocks. Or you could use Sharpies to color the bases.
 I plan on to making some vehicles and creating some IED markers out of those small bases. I hope you enjoy this tutorial!
-"Jonah"
I've seen a lot of people using paper miniatures but I wanted to show a way to create long lasting paper minis for a low cost.
Materials Needed

- Some sort of glue
- Some Cardstock or normal paper
- Wooden Craft Circles
- Foam Sheets (not foam board)
- A sharp cutting tool, I used an X-acto knife
Step 1: Printing

Step 2: Cutting


Step 3: Cutting Foam

Step 4: Gluing

Now you glue ONE side onto the foam piece. If using normal printer paper you will want to use glue that is low in water. A good strong glue stick will work or apply a thin layer of Sticky Tack Glue which dries in minutes.

As you see I did this to all of my cut out pieces but kept the other size "paired" with them so I don't get them confused.
Step 5: Trimming
I don't have a picture for this but this step you trim off extra foam and paper with your sharp cutting tool. Once you have done that then glue the other side. A tip to get it to match is to line up the "green base". You will notice that your other piece might be over the foam because you've trimmed it. Now you can easily trim off that extra paper with scissors or your cutting tool and you will have both sides aligned up real well.Step 6: Basing
Now you need to grab that bag of Wooden Craft Circles which I found at Micheals which is a craft store in the United States. As you see, in one bag there are many sizes of tokens. A small, medium and large. Grab a miniature if you have one and then see which one is the best fit. For me the medium craft circles are the exact size of a 28mm base.


NOTE: If you wish to decorate the bases then you need to do that BEFORE you glue it onto the foam so that you don't paint on the foam token. If you wish to decorate them after you've glued I suggest using PVA glue and some flock or rocks. Or you could use Sharpies to color the bases.
Step 7: Final Result
Though these miniatures are slightly smaller than the "heroic" 28mm they fit well with the 28mm paper terrain that I own and are actually pretty durable. After a couple hours of work here is my result:
-"Jonah"

Comments
Post a Comment